Seeds of Inception - Part 6
Tags: aws codepipeline inception pipeline iam rolesPart 6 planting the seed - A practical example for DevOps on AWS

What’s The Problem
In this month’s instalment, I’m going right back to the beginning to answer a question that I’m frequently asked; namely “How do I do the initial seeding of a pipeline in my shiny new AWS Account?”.
Like all things AWS-ey, there are multiple ways to accomplish this. The three that immediately come to mind are:
- Use the AWS Account root user credentials.
- Create an IAM user directly in the AWS Account.
- Assuming the /roles/OrganizationAccountAccessRole role that was created if your AWS Account was created using AWS Organisations.
The more versatile and secure way is Option 2, which I’ll discuss in detail below. My (personal) reasoning for this is you only need to keep the credentials around for as long as it takes to seed the pipeline and add more specific accounts as documented in Part 5. Once you’ve done this, delete the credentials to make the IAM User secure. If/when you need to seed another pipeline, simply regenerate new credentials and run from Step 3 again.
Warning: Parts of this post get a bit heavy on the ol’ screenshots;. brace yourself and accept my apologies in advance!
Let’s dig in!
Step 1 - AWS Account
The very first step is making sure you have an AWS Account and you have either root, admin or enough permissions to create an IAM user and policy.
Step 2 - Creating the IAM User and Policy
Much like the beloved Choose Your Own Adventure books, you get to pick which path you take through Step 2; continue reading to visit AWS Console Ville, or skip ahead to AWS CLI Island.
AWS Console Ville
Obviously, since you’re taking this path you need to log into the AWS Console.
Create A Customer Managed IAM policy
Follow the four simple actions below to create a Customer Managed IAM Policy. You’ll use this policy in the next section when we create an IAM User.
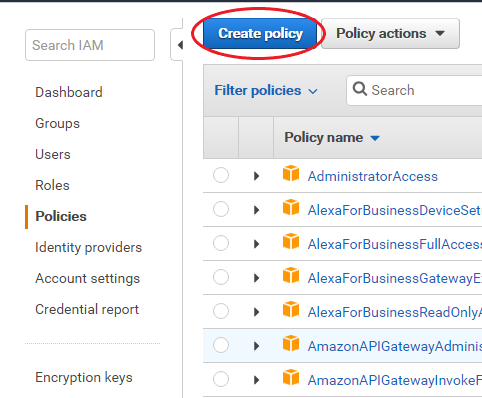
Navigate to the Policies section of the IAM console and click Create policy.
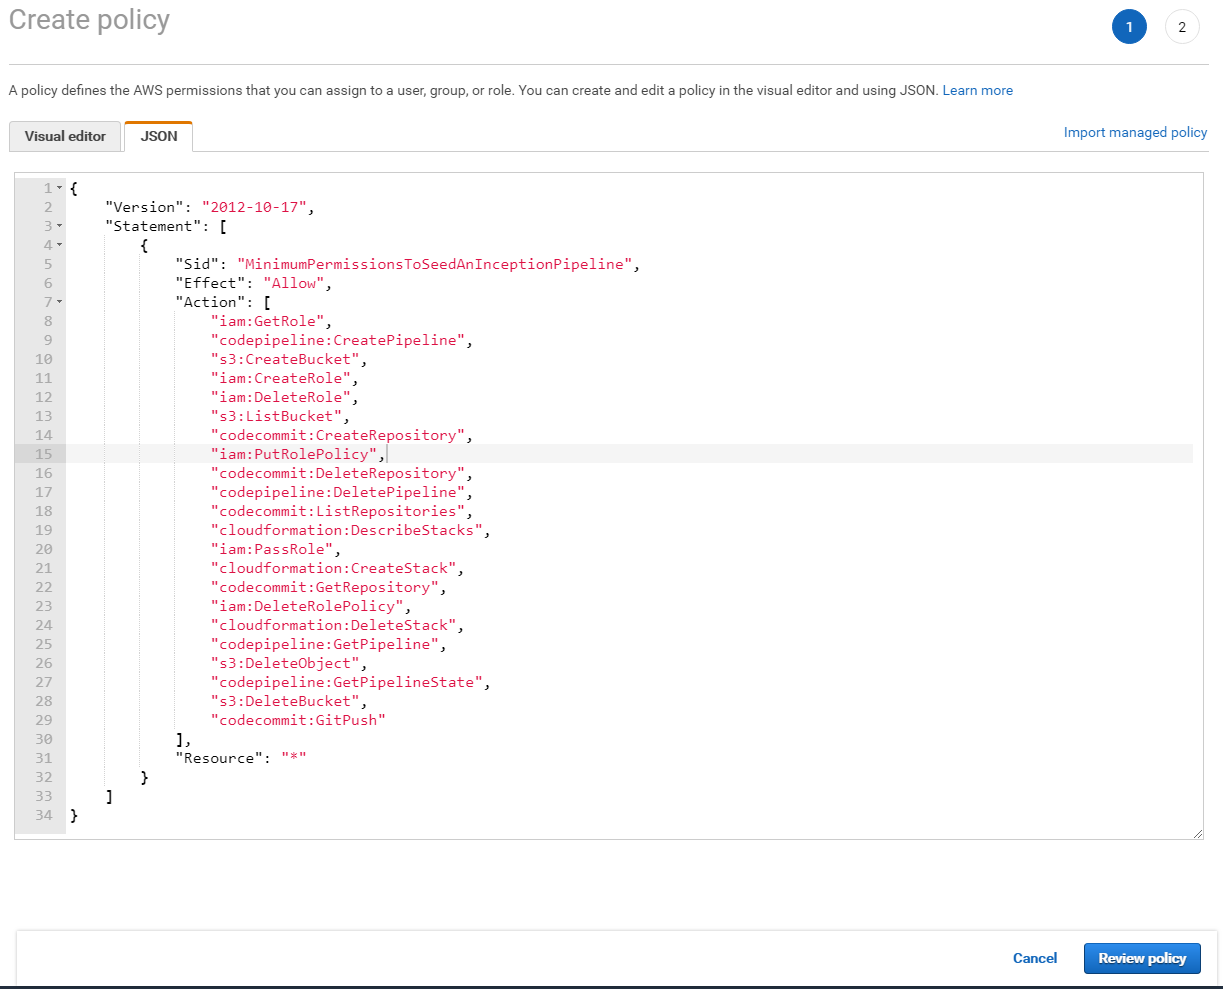
Next copy and paste the latest version of the policy from GitHub.
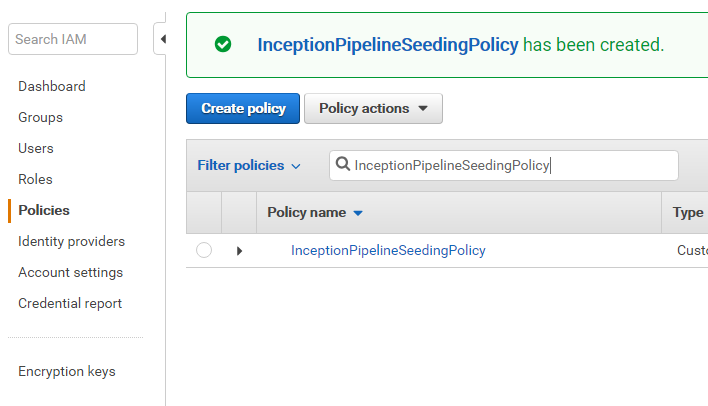
Review the policy and give it a name (required) and an optional description.

Success!
Create the IAM User
Once you’ve created the Customer Managed IAM Policy it’s now time to create an IAM User to attach it to:
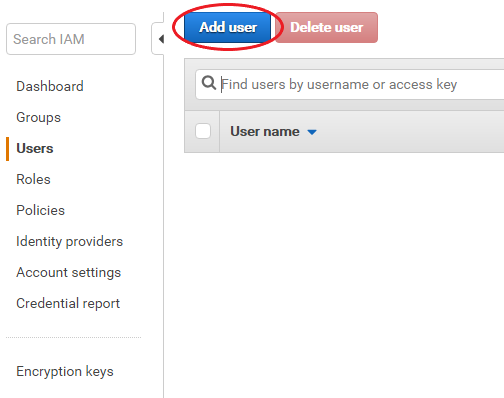
Navigate to the Users section of the IAM console and click Add user.
Give the user a name and tick Programmatic access. Unless you have an overriding and burning desire, leave the AWS Management Console access unticked.

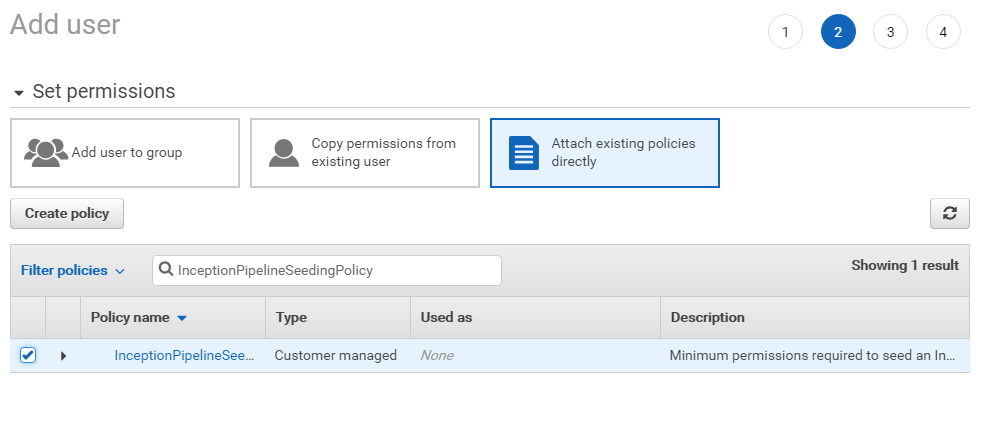
Click the Attach existing policies directly button and search for the policy we created in the previous section.
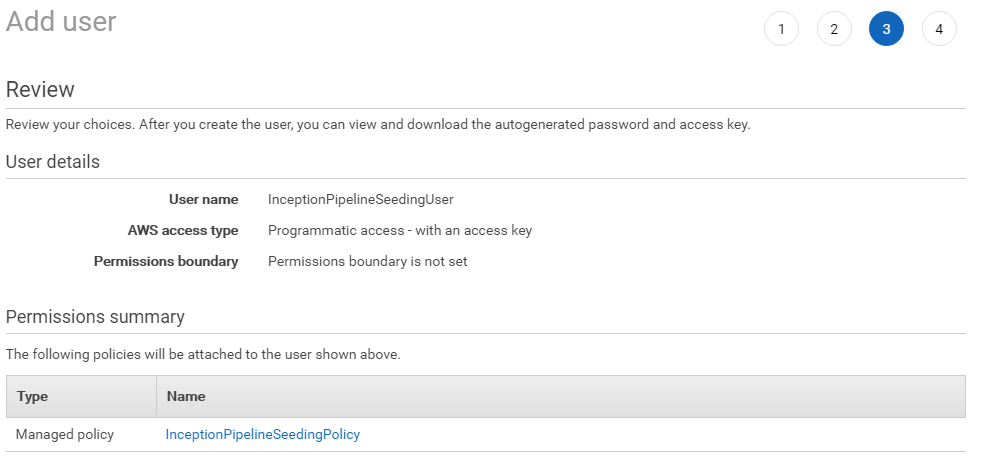
Review the user details.
Download and/or copy the credentials for late use in Step 3.
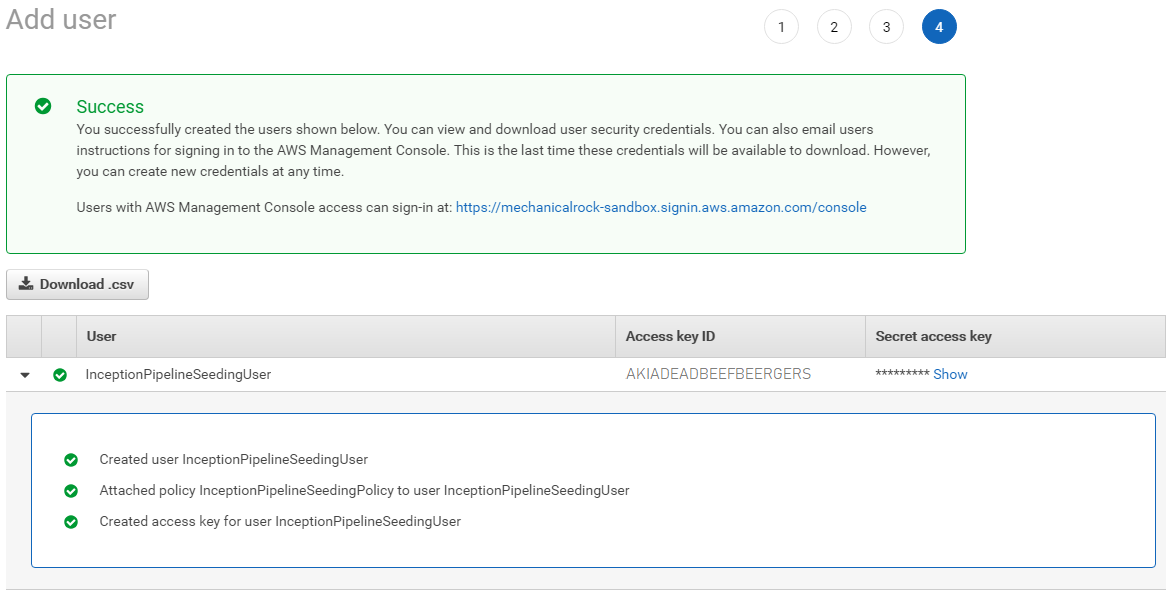
Success!
AWS CLI Island
On this path you will use the AWS CLI to create an IAM User and Customer Managed IAM Policy. Because I’m super nice and friendly and generous, I’ve wrapped up the CLI commands into a tidy little shell script here on GitHub. When you run it, this is what you’ll see:
AWS Account: 111111111111
AWS CLI profile (default is 'default'): default
{
    "Policy": {
        "DefaultVersionId": "v1",
        "AttachmentCount": 0,
        "PolicyId": "ANPAPAPERSCISSORSROCKS",
        "IsAttachable": true,
        "UpdateDate": "2018-08-23T02:08:18Z",
        "Arn": "arn:aws:iam::111111111111:policy/InceptionPipelineSeedingPolicy",
        "Path": "/",
        "CreateDate": "2018-08-23T02:08:18Z",
        "PolicyName": "InceptionPipelineSeedingPolicy"
    }
}
{
    "User": {
        "Arn": "arn:aws:iam::111111111111:user/InceptionPipelineSeedingUser",
        "Path": "/",
        "UserName": "InceptionPipelineSeedingUser",
        "UserId": "AIDAADAFORTRANCOBOLCC",
        "CreateDate": "2018-08-23T02:08:32Z"
    }
}
{
    "AccessKey": {
        "CreateDate": "2018-08-23T02:08:56Z",
        "AccessKeyId": "AKIADEADBEEFBEERGERS",
        "Status": "Active",
        "SecretAccessKey": "SecretSquirrelBusinessSsshDontTellAnyOne",
        "UserName": "InceptionPipelineSeedingUser"
    }
}
$
For the curious, these are the commands that were executed. Note: that the only dynamic value required was the AWS Account number.
aws iam create-policy --policy-name InceptionPipelineSeedingPolicy --description "Minimum permissions required to seed an Inception Pipeline, and optionally delete it if required." --policy-document https://raw.githubusercontent.com/MechanicalRock/InceptionPipeline/post/part-6/policy.json
aws iam create-user --user-name InceptionPipelineSeedingUser
aws iam attach-user-policy --user-name InceptionPipelineSeedingUser --policy-arn "arn:aws:iam::111111111111:policy/InceptionPipelineSeedingPolicy"
aws iam create-access-key --user-name InceptionPipelineSeedingUser
Step 3 - Configure Your CLI User
Now that you have your IAM User it’s time to configure the AWS CLI with the credentials. When running the aws configure command, I’ve used a specific profile name which allows me to jump between different AWS Accounts quite easily. If you are just seeding and using one AWS Account then you could just use the default profile.
$ aws configure --profile InceptionPipelineSeedingUser
AWS Access Key ID [None]: AKIADEADBEEFBEERGERS
AWS Secret Access Key [None]: SecretSquirrelBusinessSsshDontTellAnyOne
Default region name [None]: ap-southeast-2
Default output format [None]: json

$ cat ~/.aws/config
[profile InceptionPipelineSeedingUser]
output = json
region = ap-southeast-2

$ cat ~/.aws/credentials
[InceptionPipelineSeedingUser]
aws_access_key_id = AKIADEADBEEFBEERGERS
aws_secret_access_key = SecretSquirrelBusinessSsshDontTellAnyOne
Step 4 - Configure CodeCommit Access
This is an optional step that I like to perform before I seed the pipeline. When I know what the CodeCommit repository name will be, I add this snippet below into my ~/.gitconfig file. By doing so it allows the seed init.sh file to perform an initial commit and push for me which gets the Inception Pipeline green (by default it will be red as there are no files in the repository to build).
[credential "https://git-codecommit.ap-southeast-2.amazonaws.com/v1/repos/InceptionPipelinePost6/"]
    helper = !aws codecommit --profile InceptionPipelineSeedingUser credential-helper $@
    UseHttpPath = true
Step 5 - Change the default profile
Assuming you’re still reading along and you are still using the cli profile name InceptionPipelineSeedingUser, you will need to update the init.sh file, which is super easy. Simply replace default with InceptionPipelineSeedingUser on line 6 like so:
#!/bin/bash

reset

# Update to use a different AWS profile
PROFILE=InceptionPipelineSeedingUser

echo "Create the initial CloudFormation Stack"
aws --profile $PROFILE cloudformation create-stack --stack-name "@@StageAdministerPipelineStackName@@" --template-body file://aws_seed.yml --parameters file://aws_seed-cli-parameters.json --capabilities "CAPABILITY_NAMED_IAM"
echo "Waiting for the CloudFormation stack to finish being created."
aws --profile $PROFILE cloudformation wait stack-create-complete --stack-name "@@StageAdministerPipelineStackName@@"
# Print out all the CloudFormation outputs.
aws --profile $PROFILE cloudformation describe-stacks --stack-name "@@StageAdministerPipelineStackName@@" --output table --query "Stacks[0].Outputs"

export CODECOMMIT_REPO=`aws --profile $PROFILE cloudformation describe-stacks --stack-name "@@StageAdministerPipelineStackName@@" --output text --query "Stacks[0].Outputs[?OutputKey=='CodeCommitRepositoryCloneUrlHttp'].OutputValue"`

echo "Initialising Git repository"
git init
echo "Adding the newly created CodeCommit repository as origin"
git remote add origin $CODECOMMIT_REPO
echo "Adding all files"
git add .
echo "CodeCommitting files"
git commit -m "Initial commit"
echo "Pushing to CodeCommit"
git push --set-upstream origin master
Step 6 - Make It Go
Now the really hard bit (note heavy sarcasm); seed the pipeline by typing init.sh, then sit back and watch it grow!
Wrapping Up
This month’s article was a light one, mostly as I’ve been experimenting with the AWS Cloud Development Kit; specifically, how the concepts within Inception Pipeline map to this new paradigm. Stay tuned for next month’s post where I discuss (i.e. vent) my feelings and share my journey!